|
You are now able to assign unique Portal login ID’s to all the members of your staff, and you can give different access to people based on the needs and roles in your office. |
| |
|
What is a role? |
A role is a job description for which a member of your staff is responsible. Some examples of roles are office manager, claims processor, and authorization processor. Your Portal roles can be the same as your office roles.
Here are some examples of the different ways the roles in your office may be assigned:
- One staff member may perform multiple tasks for multiple doctors in your office.
- Many staff members may perform multiple tasks for only one doctor in your office.
- One staff member may perform a specific task for all doctors in your office.
The roles in your office may be some combination of the 3 examples listed; Portal is able to capture your unique situation and allow access to different portal pages for each role. |
|
|
|
|
|
What is an Access Right? |
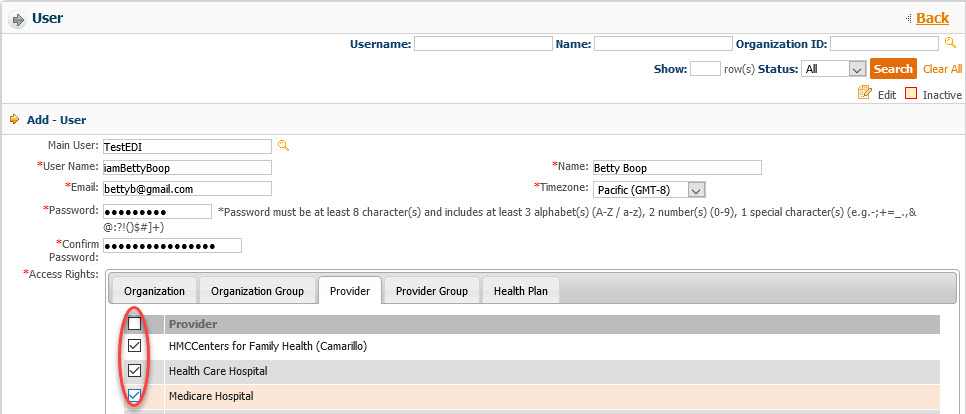
On the user page (see instructions), there is a field called “Access Rights”. In this field you choose the providers and health plans for which each staff member can perform tasks. For example, if you want staff member Jane Doe to be able to perform tasks for Dr. John Doe, then check Dr. John Doe on the provider tab when assigning access rights for Jane Doe. You can choose as many doctors in this field as you want. |
|
|
|
|
| |
|
Instructions for Assigning Unique Portal Login ID’s: |
The detailed instructions for assigning login ID’s for each member of your staff are outlined on the next page. A summary of the steps is listed below:
- Step 1: Login to Portal with your current login ID
- Step 2: Create User Roles that reflect the Roles in your office (instructions on next page)
- Step 3: Create Users in Portal (instructions on next page)
- Step 4: Notify each person of their unique username and password
- Step 5: Confirm that each person can log on with their unique username and password
- Step 6: You may want to change the password for the original login ID. This will insure that only the person with this password can change the security access.
|
|
|
|
| |
Instructions |
|
How to Create User Roles in Portal: |
- Sign into portal with your current login ID.
- Click on the “Security” tab
- Click on “User Roles” tab
- Click on the “Add New Role” button
- In the “Role Name” field, type the name you want to call role (i.e., Auth Staff, Claims Staff, Mgmt, etc.)
- Enter any notes you would like in the notes field.
- In the list of modules called Reports, Claim, Authorization/Referral, Eligibility, and Security, check the boxes that correspond to the pages you want this role to be able to access (i.e., for Claims Staff role, you might check Request and Claim Search)
- Click the “Save” button on the bottom of the page.
- The role you just created is now listed in the table at the top of this page.
- Repeat Step 4 through Step 8 until all of the roles you have in your office are created in portal.
- When you are finished creating User Roles, you can create Users.
After you are finished creating the User Roles and Users, you can continue with your Portal session or you can logoff. |
|
| |
|
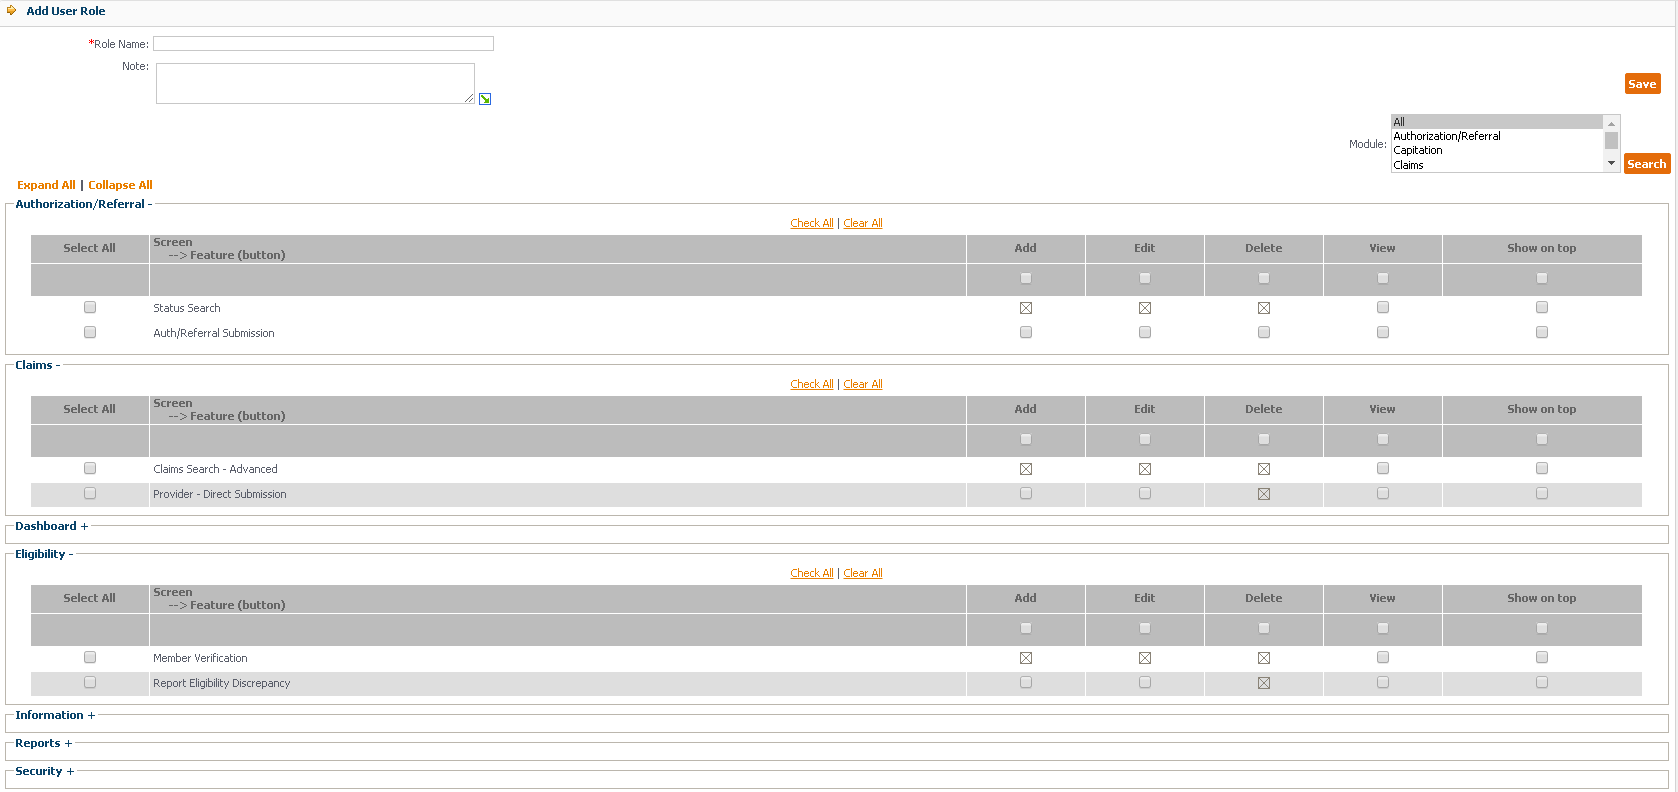 |
Image 1:
Bottom part of User Role page. Ready to create a new user. |
| |
|
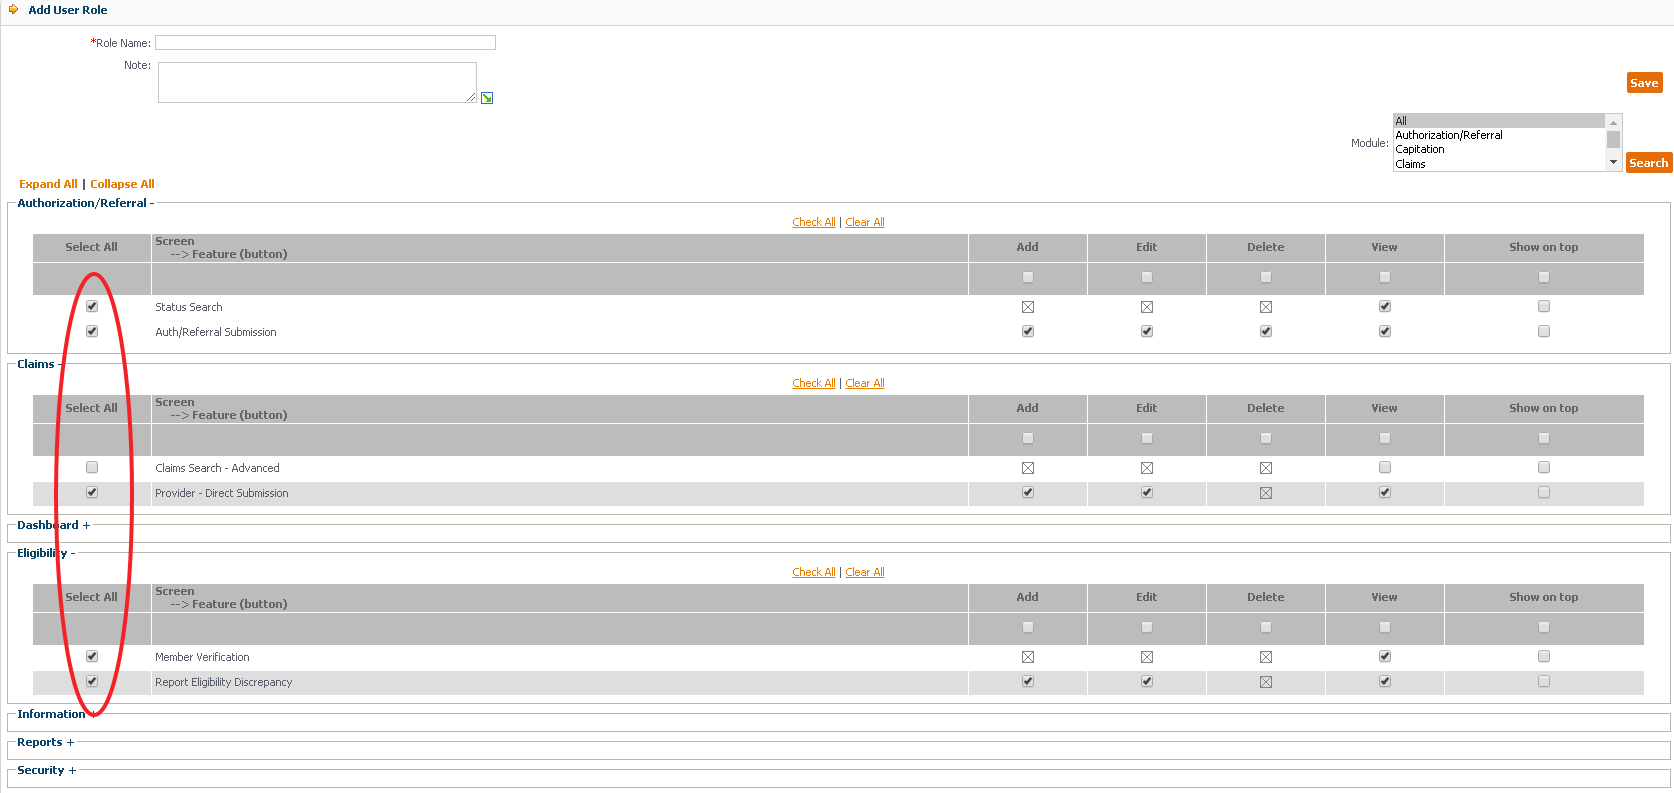 |
Image 2:
Check these boxes to assign modules to the role you are creating. In this case, the role is office manager. |
| |
|
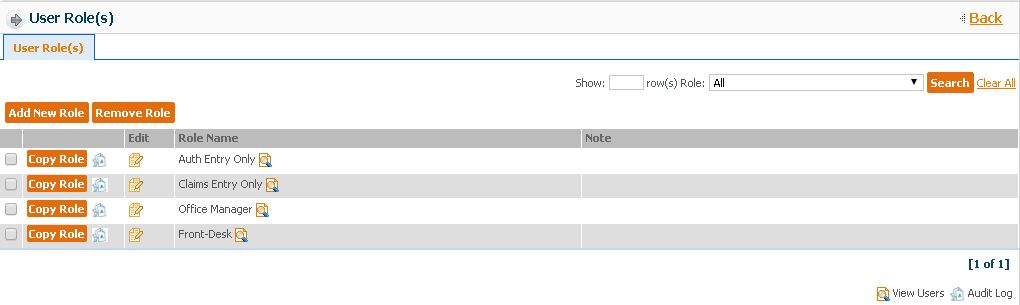 |
Image 3:
The table at the top of the page with Office Manager Role added. |
|
|
| |
How to Create Users in Portal: |
- Sign into portal with your current login ID
- Click on the Security tab
- Click on User tab
- Click on the Add button
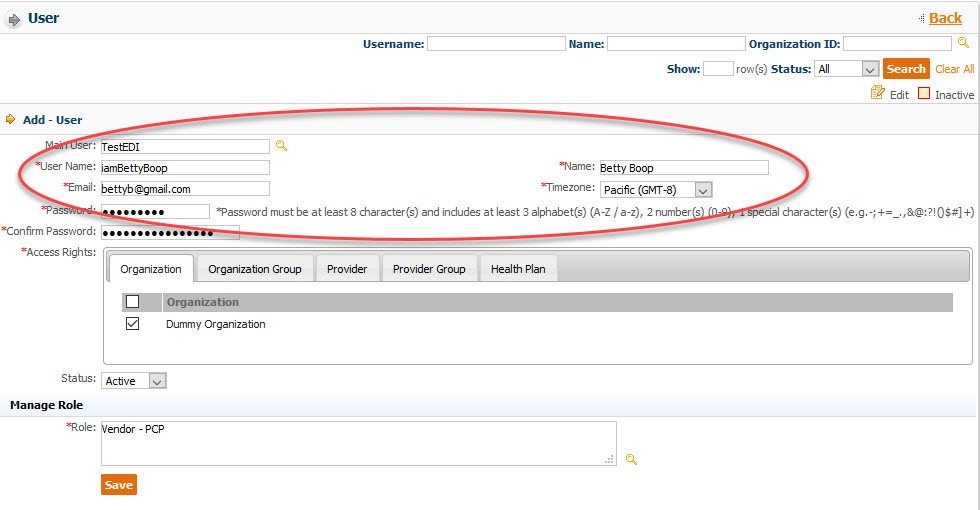
- Type the requested information in the fields
- The User Name and Password assigned on this page is the Portal Login ID for the person whose name you enter in the Name field.
- Notify each person of
- Fields with (*) are required.
- Be sure to choose a Role
- Check the access rights you want the named person to have.
- Click the Save button at the bottom of the page.
- The User you just created in now listed in the table at the top of this page.
- Repeat Step 4 through Step 7 until all of the staff you want to assign a unique portal log in have been added.
|
|
| |
 |
 |
 |
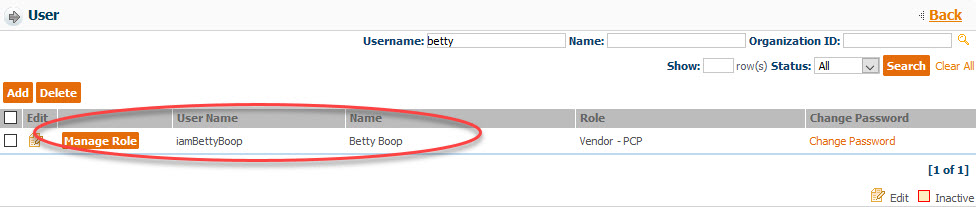 |
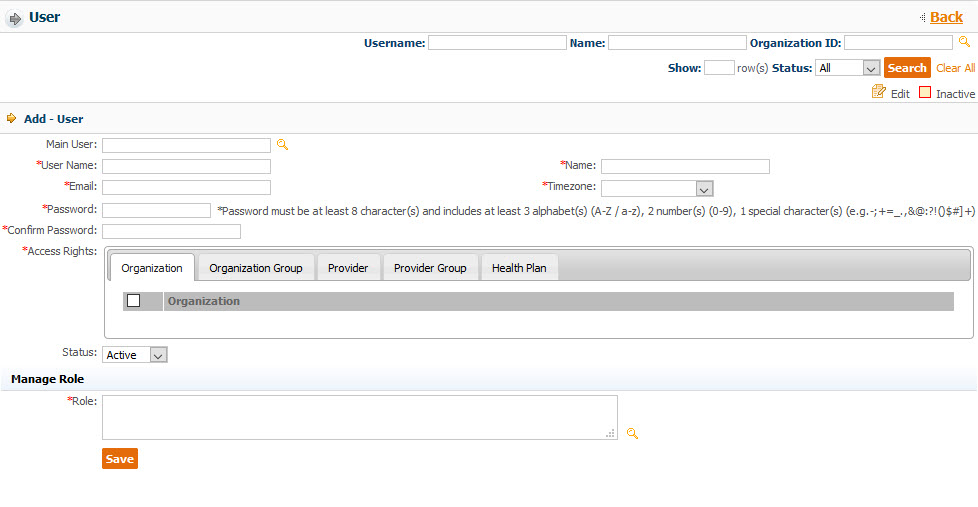
Image 4:
Blank User Page Ready to create a new user. |
Image 5:
Completed fields necessary to create a new user. This users new portal login ID: username is iamBettyBoop and password is the password that was typed in this page. |
Image 6:
Choose providers for whom this user can perform tasks. This allows the user access to the checked providers patients. |
Image 7:
Betty Boop saved as a User |
|
|
| |
|
|
|
| |
|
|
